
Tired of lackluster locks and a less-than-sparkling scalp? Imagine stepping into your shower and being greeted by a cool, tingling sensation that awakens your senses and leaves your hair feeling incredibly fresh. That's the power of peppermint! And the best part? You can easily whip up your own invigorating peppermint shampoo right at home.
Peppermint essential oil is a powerhouse ingredient, celebrated for its refreshing aroma and a host of benefits for your hair and scalp.It's known to stimulate circulation, which can promote hair growth, and its natural cleansing properties can help clarify the scalp, potentially reducing dandruff and oiliness.Plus, that signature cooling effect can soothe itchiness and leave your scalp feeling revitalized.
While there are many peppermint-infused shampoos on the market, creating your own allows you to control the ingredients, avoid harsh chemicals, and tailor it to your hair's needs. It's simpler than you think, especially with quality, ready-to-use ingredients.
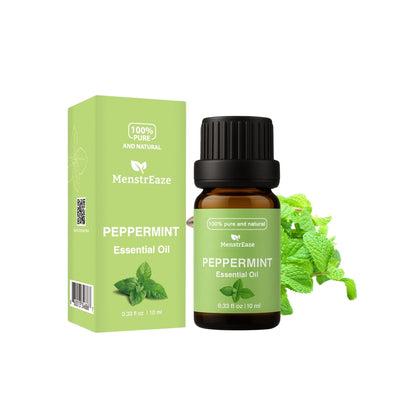
Let's dive into how you can create a simple yet effective DIY peppermint shampoo, potentially using a product like the Peppermint Essential Oil Dropper Bottle, which conveniently comes pre-diluted with nourishing Grapeseed Oil.

Why Make Your Own Peppermint Shampoo?
- Know Your Ingredients: Say goodbye to long, confusing ingredient lists packed with synthetic fragrances, sulfates, and parabens.
- Tailored to You: Adjust the peppermint concentration to your liking.
- Cost-Effective: Often, making your own beauty products can be friendlier to your wallet in the long run.
- Invigorating Experience: Enjoy the natural, uplifting aroma and cooling sensation every time you wash your hair.
- Scalp Health: Peppermint oil can help clarify the scalp, combat oiliness, and soothe irritation.
What You'll Need
- Unscented Liquid Castile Soap or a Mild, Unscented Shampoo Base: This will be the foundation of your shampoo. Look for a gentle, natural option. (About 1 cup)
- Peppermint Essential Oil Blend:Using a pre-diluted product like the "Peppermint Essential Oil Dropper Bottle" (which contains 100% Nature Peppermint Oil and Grapeseed Oil) is a great option as it's formulated to be skin-safe. If using pure, undiluted peppermint essential oil, you'll need to be more cautious with dilution and ensure you have a separate carrier oil like jojoba, coconut, or grapeseed oil. (For a pre-diluted product, start with 15-25 drops per cup of shampoo base. If using pure, undiluted peppermint oil, start with only 5-10 drops per cup of shampoo base and ensure it's well mixed with a tablespoon of carrier oil before adding to the soap base).
-
Optional Nourishing Additions:
- Aloe Vera Gel (1-2 tablespoons): For extra soothing and moisture.
- Vegetable Glycerin (1 teaspoon): For added moisture and smoothness.
- Other Essential Oils (1-2 drops, ensure they are hair-friendly): Like lavender for calming, rosemary for growth, or tea tree for clarifying (use sparingly and patch test).
- A Clean, Empty Bottle with a Lid: An old shampoo bottle (thoroughly cleaned) or a new pump bottle works perfectly.
- Funnel (optional, but helpful).

Step-by-Step Guide to Your DIY Peppermint Shampoo
- Prepare Your Bottle: Ensure your chosen bottle is clean and dry.
- Pour in the Base: Using a funnel if you have one, pour your unscented liquid castile soap or shampoo base into the bottle. Fill it about three-quarters full to leave room for the other ingredients and for shaking.
-
Add the Peppermint Power:
- If using a pre-diluted peppermint oil blend (like the example product): Add 15-25 drops directly into the shampoo base. You can start with fewer drops and add more later if you prefer a stronger scent or sensation.
- If using pure, undiluted peppermint essential oil: In a separate small bowl, mix 5-10 drops of pure peppermint essential oil with about 1 tablespoon of a carrier oil (like grapeseed, jojoba, or melted coconut oil). Mix well. Then, add this diluted oil mixture to your shampoo base. Never add undiluted essential oils directly to your scalp or a large base without proper dilution.
- Incorporate Optional Goodies (If Using): Add your aloe vera gel, vegetable glycerin, or any other chosen essential oils now.
- Mix it Up: Secure the lid tightly on the bottle. Gently shake the bottle for about 30 seconds to a minute to ensure all the ingredients are well combined. You might want to turn it end over end slowly a few times as well.
- Label It: Don't forget to label your creation with the ingredients and the date you made it.
How to Use Your DIY Peppermint Shampoo
- Wet your hair thoroughly.
- Apply a small amount of your DIY peppermint shampoo to your scalp and hair.
- Massage gently into your scalp for a minute or two, enjoying the cooling sensation. Work the lather through the lengths of your hair.
- Rinse thoroughly with lukewarm water.
- Follow up with your usual conditioner if needed.
Tips for Success & Storage
- Patch Test First: Even with natural ingredients, it's wise to do a patch test. Apply a small amount of the finished shampoo to a discreet area of your skin (like behind your ear or on your inner elbow) and wait 24 hours to check for any irritation before using it on your entire scalp.
- Shake Before Each Use: The ingredients may naturally separate a bit over time, so give the bottle a gentle shake before each wash.
- Storage: Store your DIY shampoo in a cool, dark place. Since it doesn't contain the strong preservatives of commercial products, it's best to make smaller batches more frequently. Aim to use it within 1-2 months.
- Listen to Your Scalp: If you find the peppermint too strong, use fewer drops next time. If you have very sensitive skin, you might want to start with an even lower dilution.
- Avoid Eye Contact: Peppermint oil can be irritating to the eyes. If you get shampoo in your eyes, rinse immediately and thoroughly with cool water.
Enjoy Your Refreshing Creation!
Crafting your own DIY peppermint shampoo is a simple, rewarding way to take control of your haircare routine. You'll love the invigorating tingle, the fresh scent, and the satisfaction of knowing exactly what you're putting on your hair and scalp. Happy mixing!